Using a grid system provides a methodical organization of excavation sites, including lacustrine and underwater sites, allowing precise documentation of finds and facilitating stratigraphic analysis. This technique improves communication and collaboration within teams, ensures better resource and time management, and helps minimize damage to unexcavated areas. It also plays an important role in spatial analysis.
Create a grid
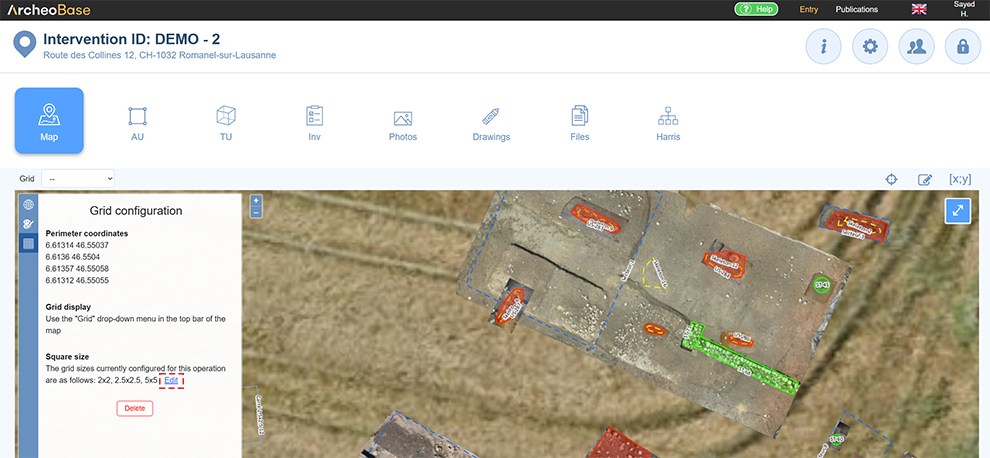
The Grid Configuration  icon allows you to create a grid by entering the coordinates of the 4 points that define its perimeter. The points must form a perfect rectangle. This rectangle can either be created in a GIS such as QGIS or ArcGIS, or computed by a large language model (LLM) such as ChatGPT using the coordinates of the points one of its sides.
The coordinate system used must match the intervention’s coordinate system.
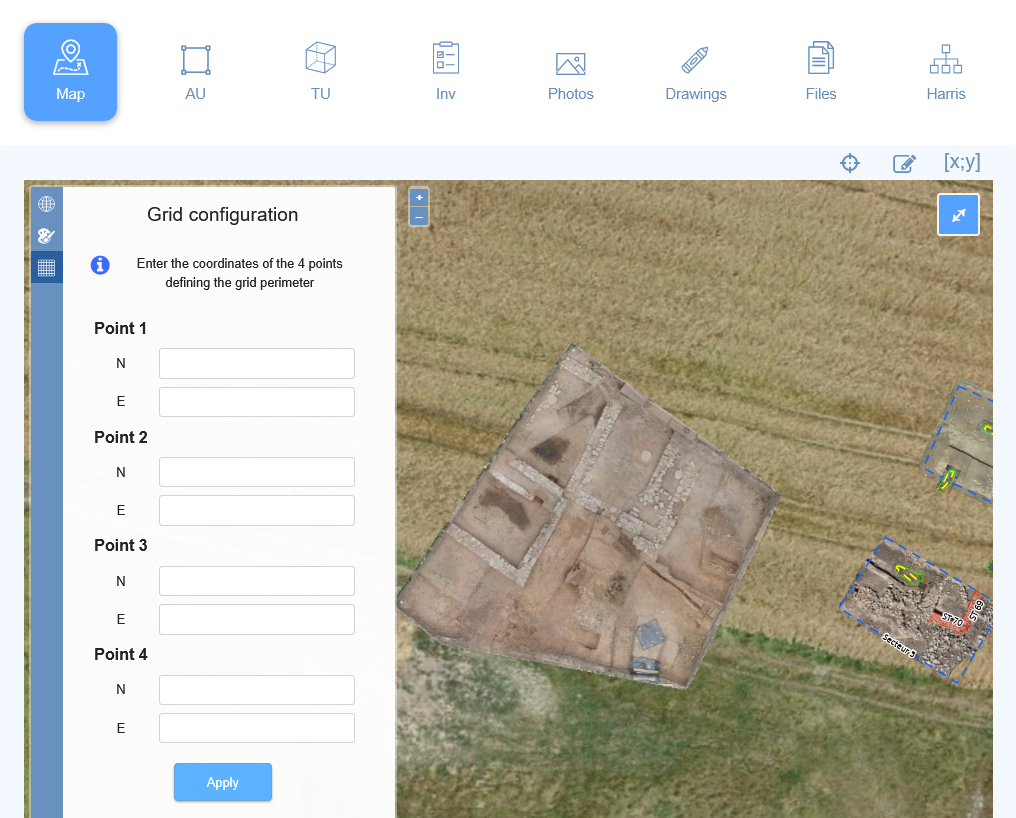
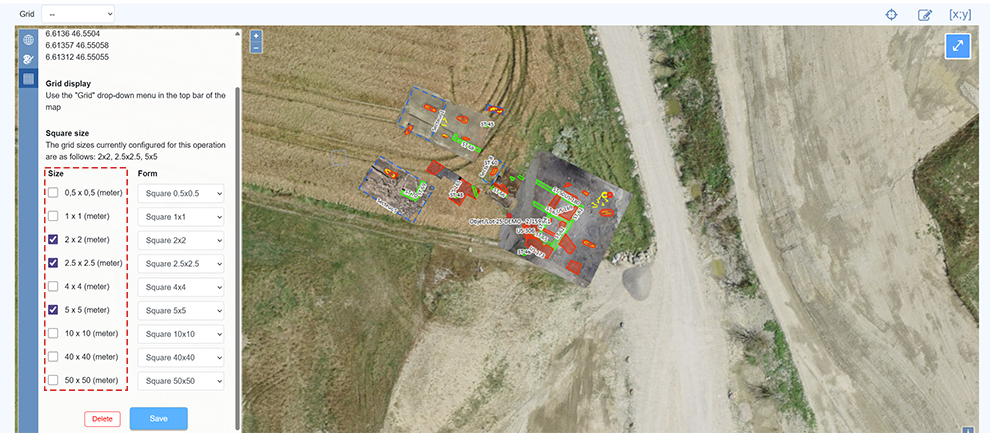
Grid configuration can continue by selecting square sizes and their respective form types.
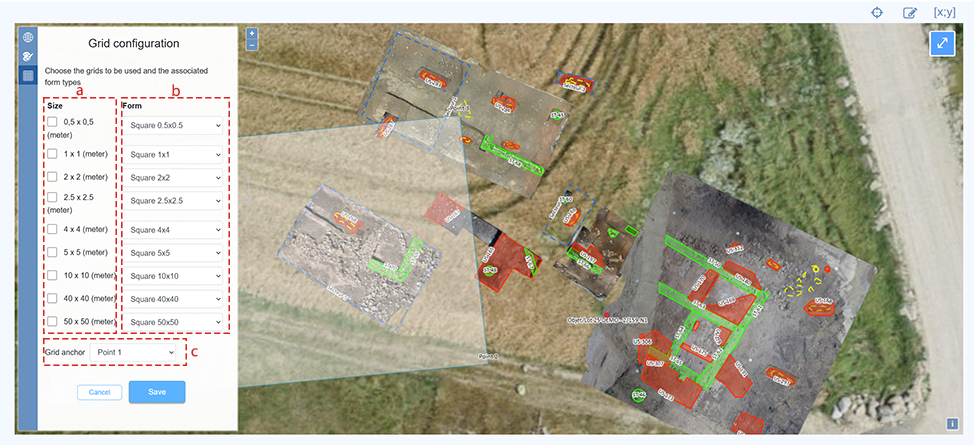
| a | Standard grid sizes; multiple sizes can be selected at the same time. |
| b |
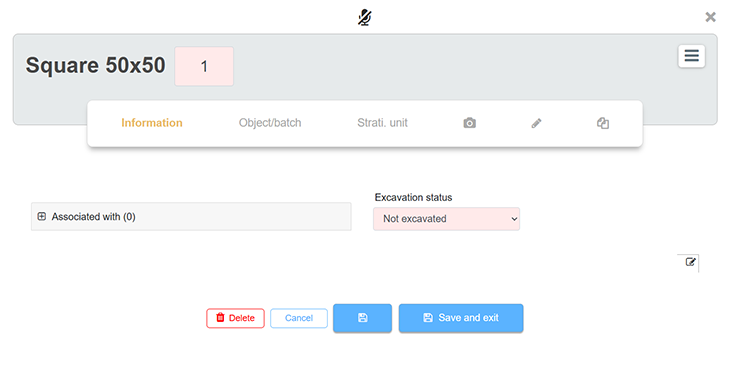
By default, after selecting the size, a new form type is generated to represent the squares of the grid. The new form type matching the selected grid size is automatically added to the technical units (UT) of the project. Here's an example of the form type Square 50x50: It is also possible to associate the grid with an existing form type, such as Test Pit. In this case, the value Test Pit can be selected from the Form dropdown menu. |
| c | Grid anchoring: Squares will be generated based on the drawn perimeter. At one of the rectangle's ends, some squares might be cut off. To prevent this, anchoring the grid to the bottom left ensures the bottom-left squares remain whole. |
Display the grid on the map
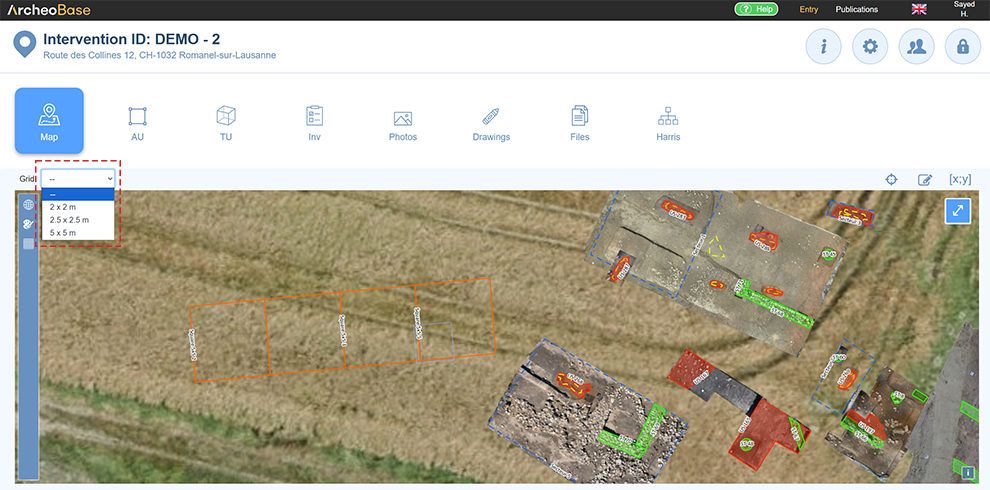
Once the grid is configured, a dropdown menu lets you display the grid with the desired square size. Only one grid definition can be displayed at a time.
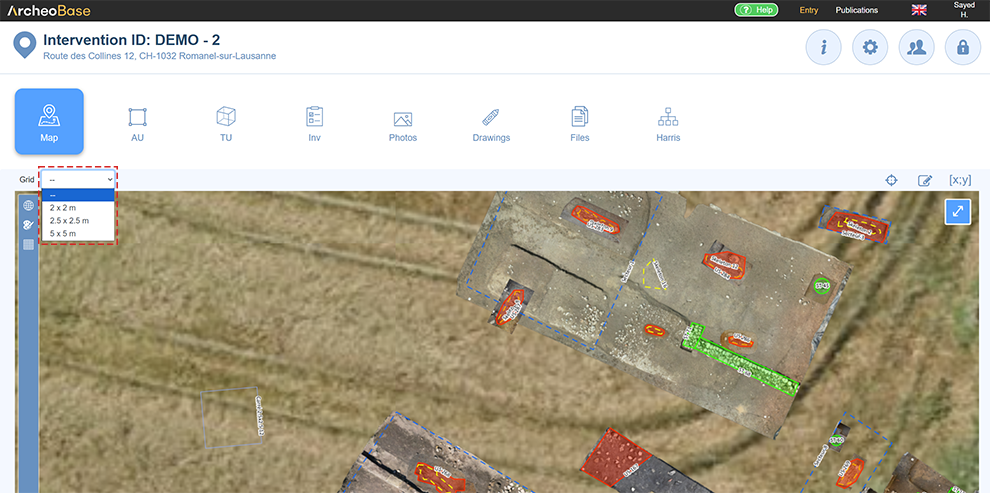
Available sizes in the dropdown match the ones selected in the Grid Configuration menu. If a size is missing, it can be added via the Edit icon.
Create a grid square
Once a grid size is displayed on the map, a square can be selected to create a new form or assign it to an existing one. Thus, each desired square can generate a form.
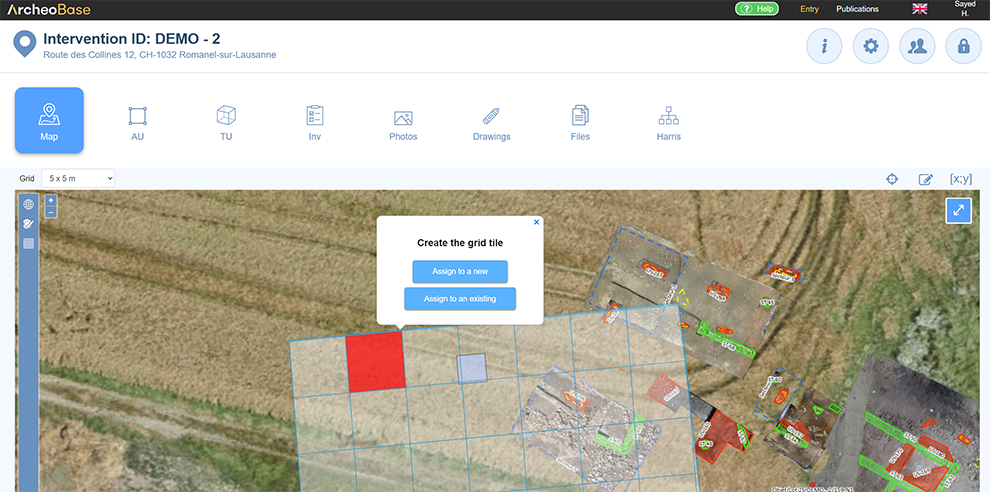
Assign to a new form
Assigning a square to a new form lets the user define the square’s ID number. In this case, the number must be entered manually by the user—it is not generated automatically. Once the form is created, the square turns purple. Its size and ID number are then displayed on the map.
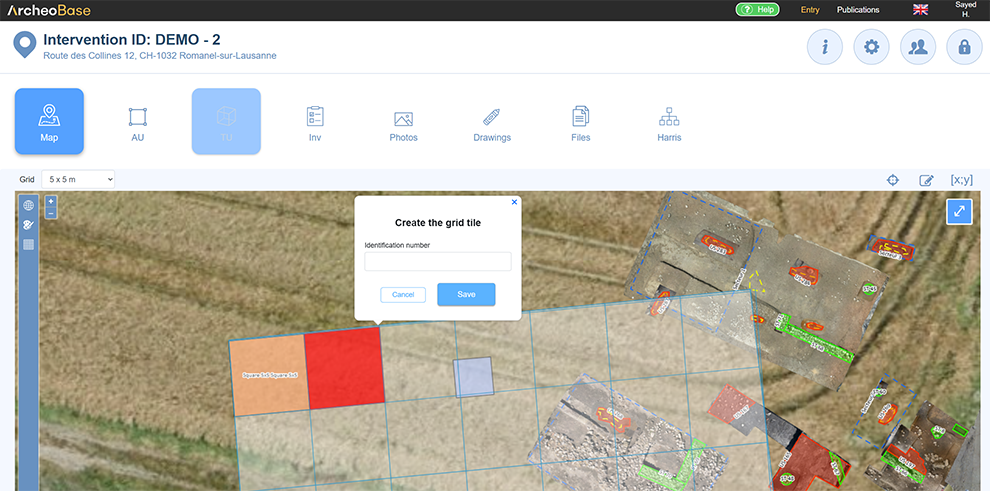
Assign to an existing form
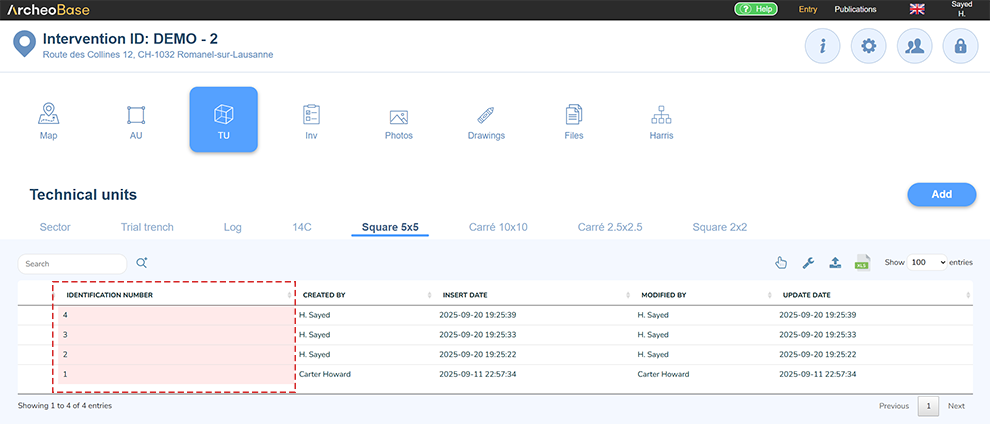
If forms have already been created, each square can be individually assigned to a corresponding form.
The advantage of creating empty forms is that they benefit from automatic numbering. They can easily be generated using the  icon and selecting Duplicate x times.
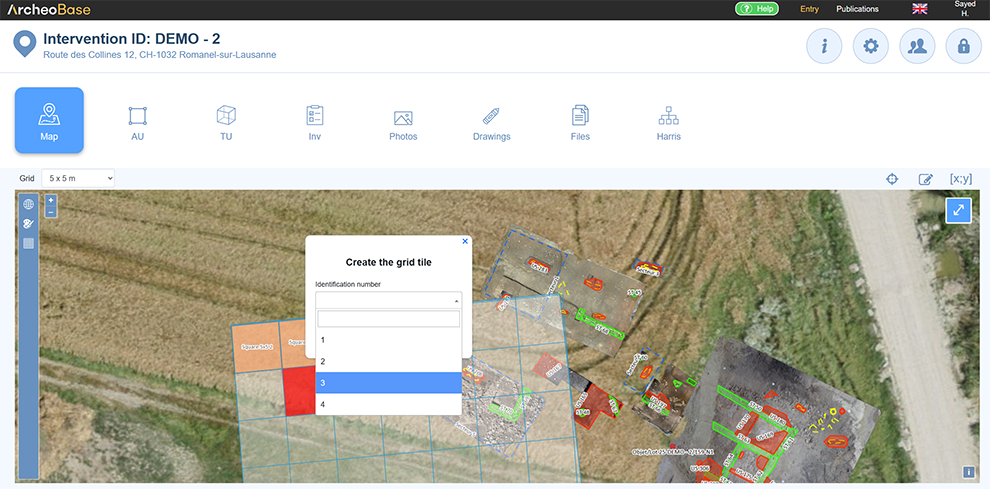
From the map, simply click a grid square to assign it to an existing form.
Deselect the grid
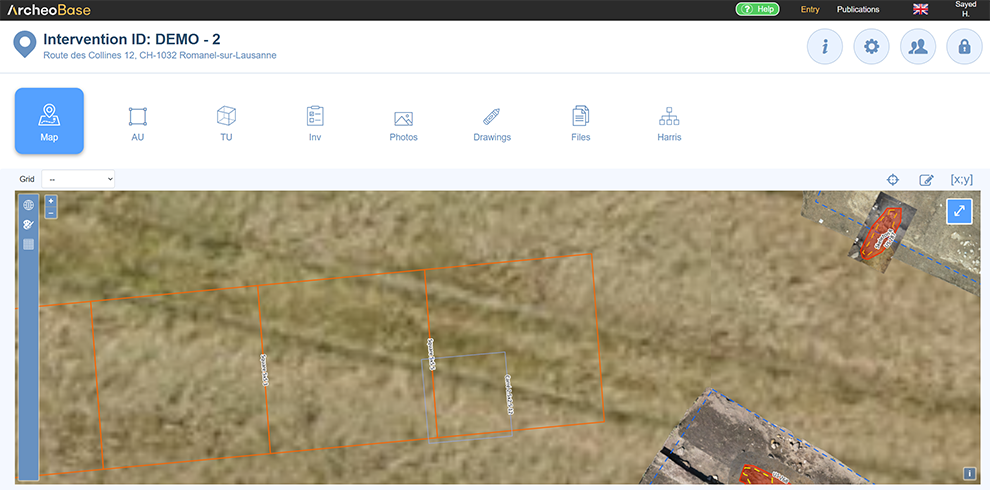
Once the required squares have been validated by assigning their respective forms, they appear in purple on the map.
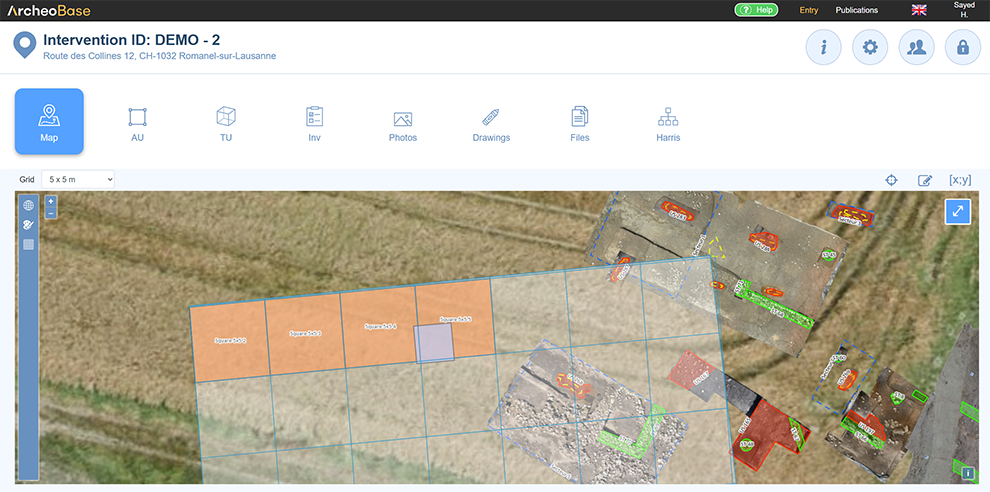
Since the grid is no longer necessary, it can be deselected from the dropdown menu, and only the validated squares' geometries remain visible on the map.
Associations
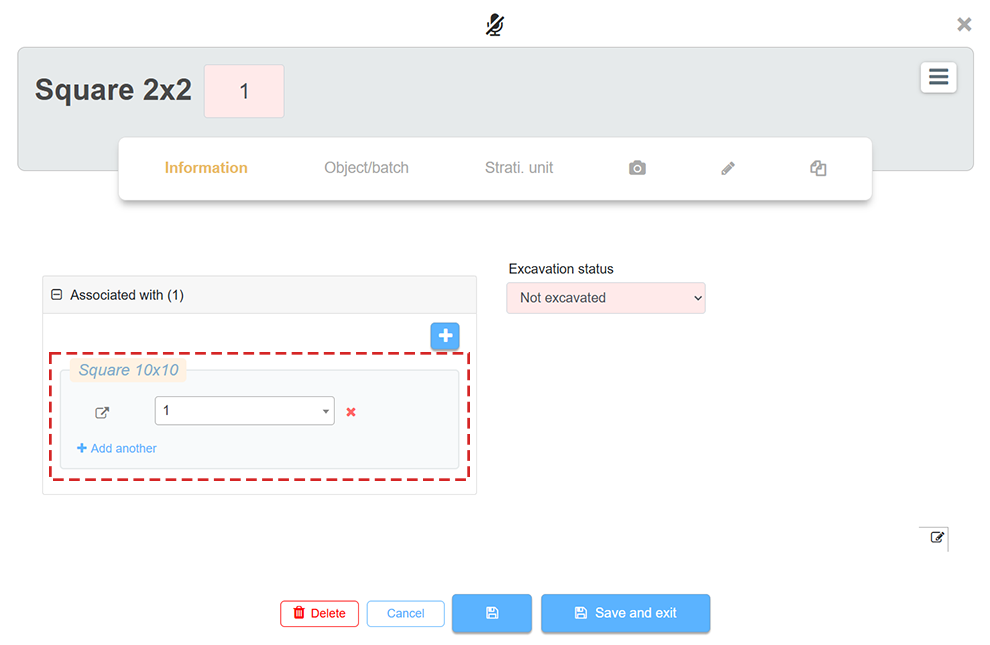
Associations between squares from different grid meshes are created automatically. The following example shows a 2x2 square created inside a 10x10 square.
It can be observed that Square 2x2 and Square 10x10 have been automatically associated:
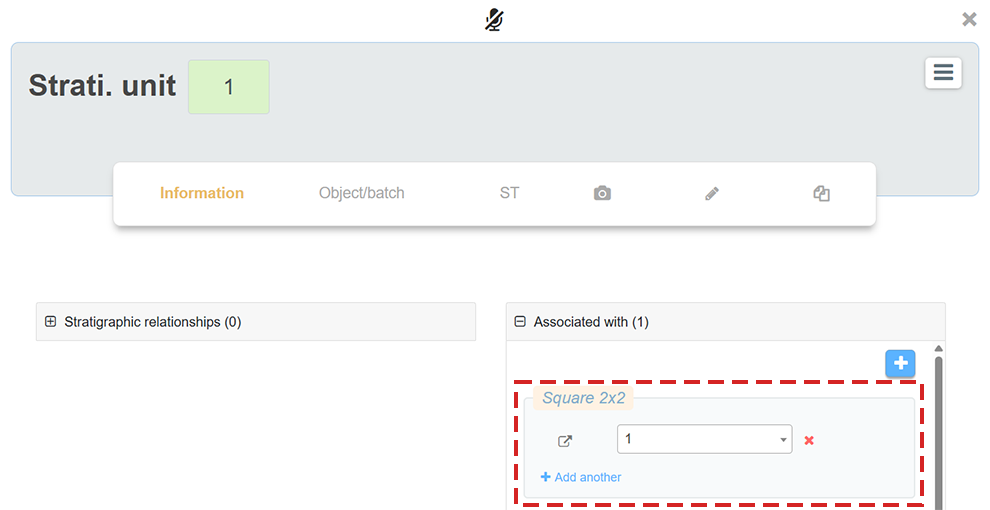
Forms representing grid squares behave like other form types. They can have Dynamic Fields and be associated with other elements like finds, stratigraphic units, etc. The following example shows that SU 1 is associated with Square 2x2 No. 1:
Overview
It is highly beneficial to use Indirect Associations with grid squares. For example, by defining an indirect relationship rule like Square 10x10 contains Square 2x2, all information related to a Square 2x2 will appear in the parent Square 10x10.
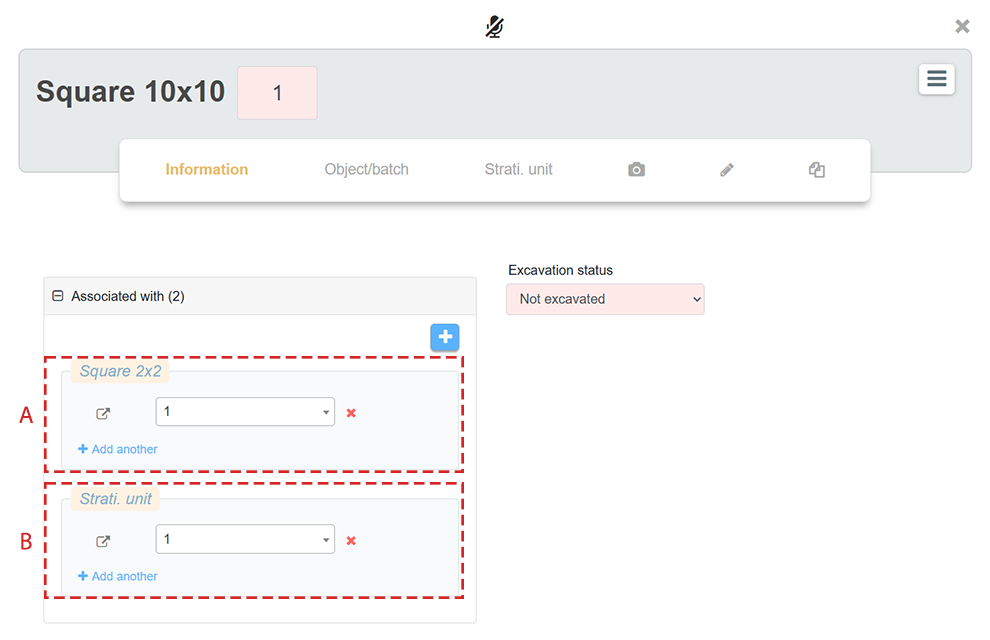
As a result, viewing a Square 10x10 provides an overview of all contents from the Square 2x2 within it. In this example, the Square 10x10 form shows two associations:
- A: A direct association that was automatically created with Square 2x2 No. 1.
- B: An indirect association, displayed in a different style (blue hue and dashed border), with SU 1, which was originally associated with Square 2x2 No. 1. The info button on the right side of the field reveals the pathway taken by this indirect association.
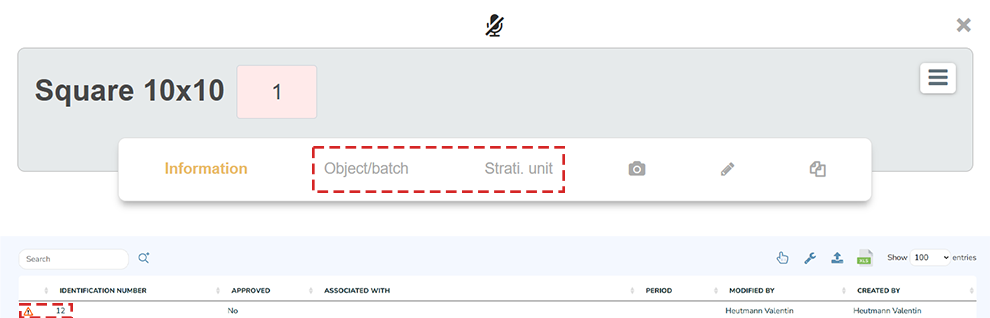
Visualizing a large number of associations (direct and indirect) can be overwhelming. To maintain an overview, tabs can be added to the Square 10x10 form menu bar to list, for example, all SU or ST it contains in a table. This also enables the use of search tools.
The following example shows SU 1 in the SU tab table, a tab added to the form menu of Square 10x10 forms.